

-
Products
-
2D Cutting

-
Tube Cutting
-
3D Cutting
-
BLT Intelligent Cutting
-
Industrial Software
-
-
Portfolio
-
-
2D Cutting Head
Tube Cutting Head
Plane Bevel Cutting Head
Structural Steel Cutting Head
-
Popular products
-
- Online Store
- Service & Support
- About BOCHU
- Investors Relations


- Software Download
- Manual
- Tutorial
- CloudNest
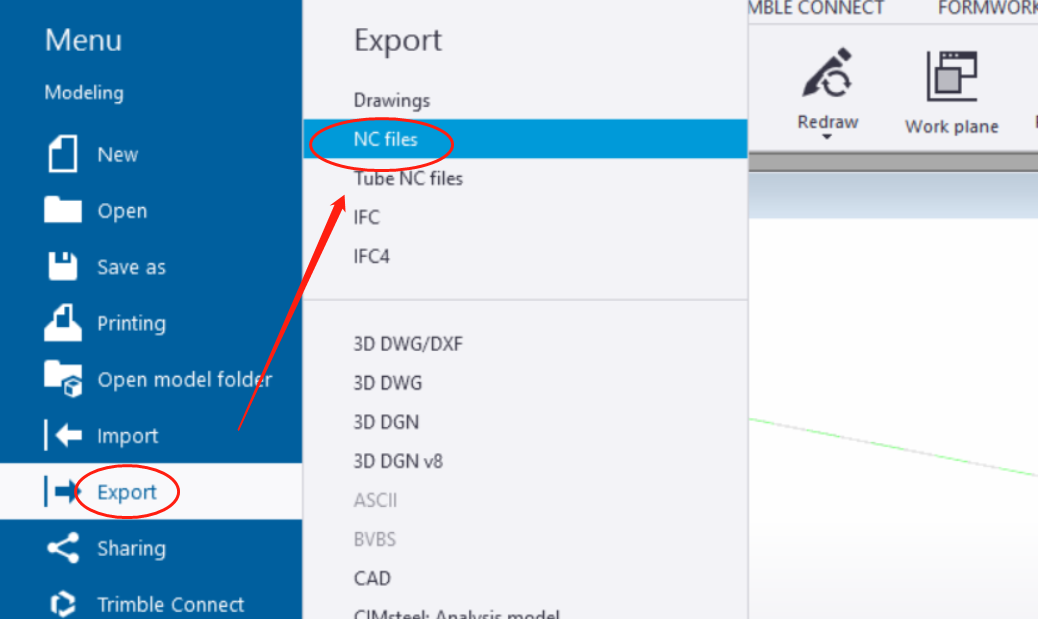
In Tekla, click ‘Export’ and select ‘NC files’.
In the pop-up window, click ‘Add’ to create a new NC file setting.
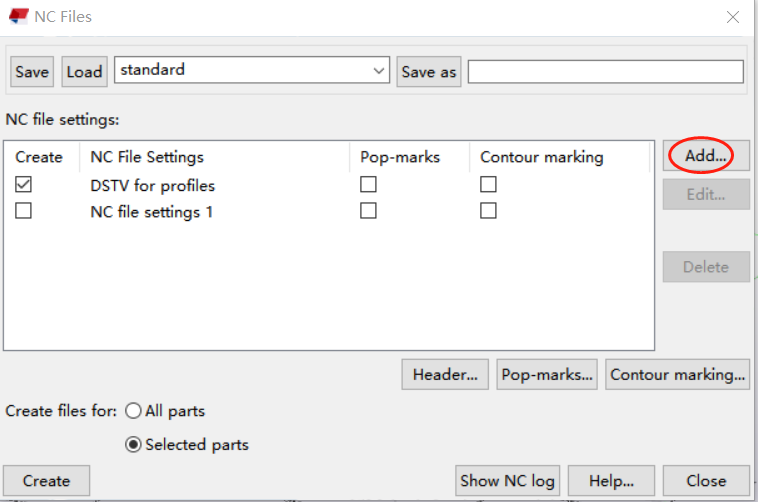
First, edit the Settings name for easy reference.
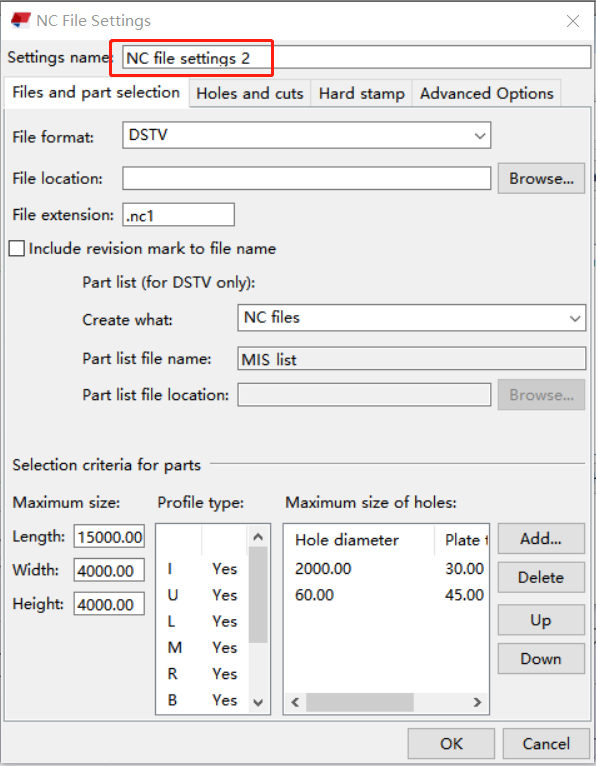
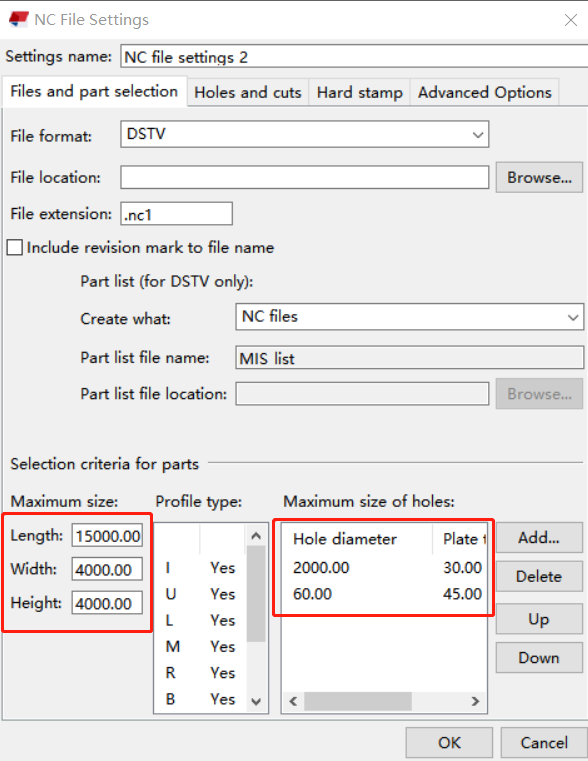
On the ‘File and Part Selection‘ tab, select the interface type and click ‘OK‘.
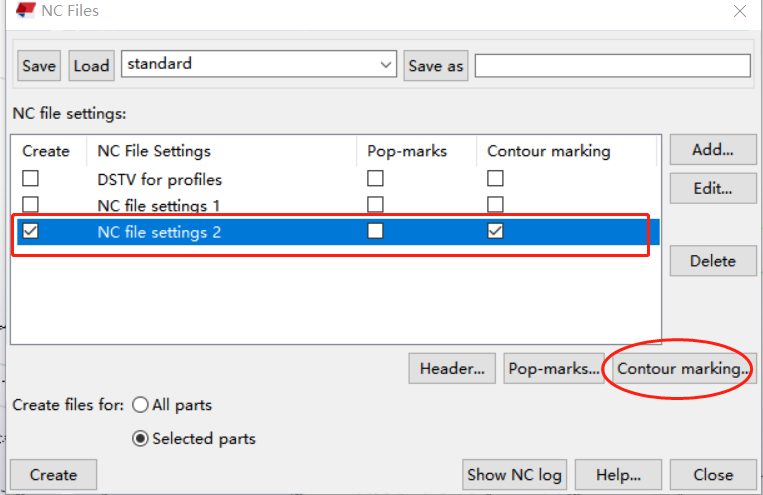
After closing the pop-up window, in the NC file settings list, select the newly created file setting, check ‘Contour marking‘, and click the ‘Contour marking‘ button to set the contour marking rules.
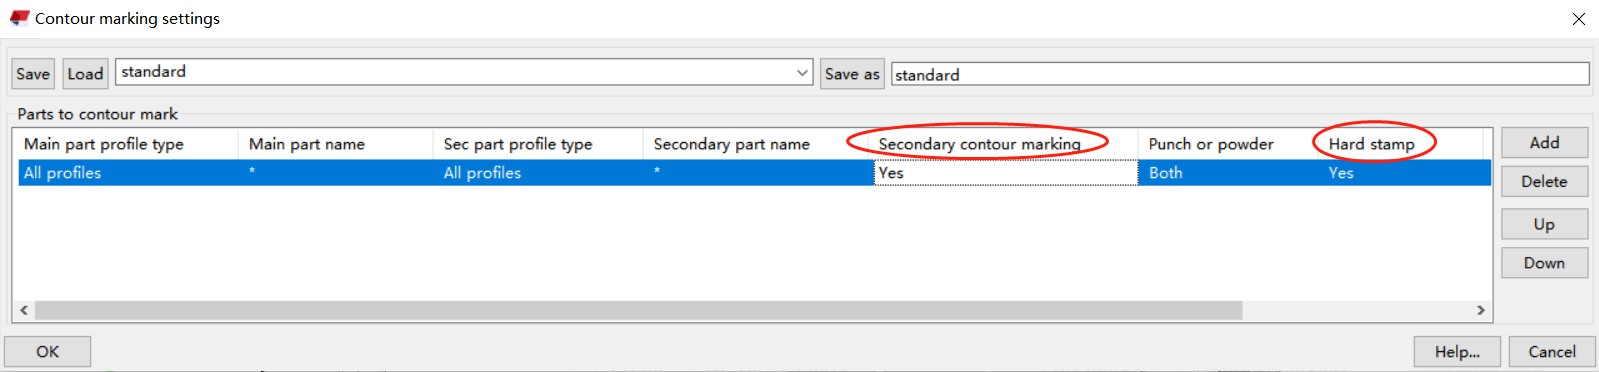
Configure the settings according to the following image. Select ‘All profiles‘ for the ‘Main part profile type‘. If you want to display part markings in CloudNest, select ‘Yes‘ for ‘Secondary contour marking’. If you want to display marking numbers in CloudNest, select ‘Yes‘ for ‘Hard stamp‘, then click ‘OK‘.
更新时间:2023-09-11

In Tekla, click ‘Export’ and select ‘NC files’.
In the pop-up window, click ‘Add’ to create a new NC file setting.
First, edit the Settings name for easy reference.
On the ‘File and Part Selection‘ tab, select the interface type and click ‘OK‘.
After closing the pop-up window, in the NC file settings list, select the newly created file setting, check ‘Contour marking‘, and click the ‘Contour marking‘ button to set the contour marking rules.
Configure the settings according to the following image. Select ‘All profiles‘ for the ‘Main part profile type‘. If you want to display part markings in CloudNest, select ‘Yes‘ for ‘Secondary contour marking’. If you want to display marking numbers in CloudNest, select ‘Yes‘ for ‘Hard stamp‘, then click ‘OK‘.
更新时间:2023-09-11
-

Download
-

Contact us
-

Online consultation

